To replace the carbon vane in a rotary vane vacuum pump, lock out power, vent and drain oil, remove the end cover, slide out worn vanes, clean the rotor slots, install new vanes in the correct orientation with light oil film, reassemble with a new gasket/O-ring, refill oil, and run a short break-in while monitoring vacuum and current.
Step-by-step vane replacement procedure (what to do and what to check)
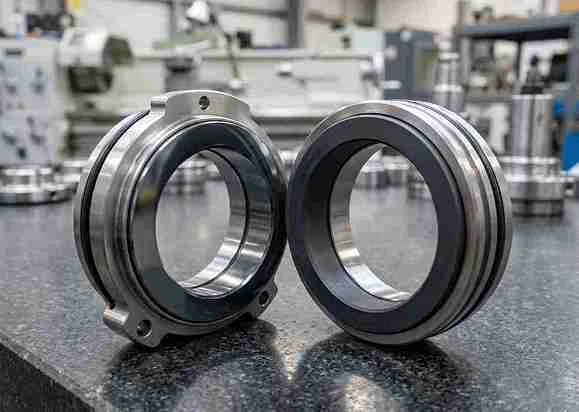
A vane swap is straightforward, but precision matters: vane fit, slot cleanliness, and cover alignment directly affect ultimate vacuum, temperature, and vane life. Use the pump’s manual for torque values and clearances; if unavailable, document your as-found assembly (photos/marks) before disassembly.
Recommended workflow
- Isolate & make safe: Lock out/tag out, vent to atmosphere, confirm zero pressure differential.
- Drain & inspect oil: Drain warm oil; note discoloration, carbon fines, metallic sheen (root-cause clues).
- Access the rotor: Remove guard/coupling as needed; remove end plate/cover. Keep shims in order.
- Extract vanes: Rotate shaft by hand and slide each carbon vane out of its slot (don’t pry against the rotor).
- Clean & inspect: Clean rotor slots and housing (lint-free wipes). Inspect slot edges for burrs, rotor scoring, and end-plate wear.
- Measure criticals: Check vane thickness/length vs. new, slot width, and end-clearance if specified.
- Install new vanes: Lightly oil; insert vanes with correct leading/trailing edge orientation (if chamfered/marked). Ensure free sliding in slot.
- Reassemble: Replace gasket/O-ring; reinstall cover/end plate; torque evenly in a cross pattern.
- Refill & prime: Fill to correct level with specified vacuum pump oil; rotate by hand to verify smoothness.
- Break-in & verify: Run 10–30 minutes with inlet open, then cap/valve and verify ultimate vacuum, motor current, temperature, and noise.
Common checks (fast diagnostics)
| Checkpoint | What “good” looks like | If not, likely cause |
|---|---|---|
| Vane slides freely | Drops/moves under gravity or light finger push | Slot contamination, burrs, wrong vane thickness |
| Cover seating | Even contact, no binding when hand-rotated | Misaligned cover, trapped debris, warped plate |
| Ultimate vacuum | Returns near historical baseline | Leaks, worn end plate, wrong vane material, poor oil |
| Motor current/temperature | Similar to baseline | Vane drag, wrong oil viscosity, internal scoring |
Carbolve Pro Tip: In our lab tests at Carbolve, we found that most “new vane but low vacuum” cases come from micro-debris in rotor slots or a nicked end-cover O-ring—cleaning the slot corners and replacing elastomer seals restores performance far more often than changing oil alone.
How does How to Replace the Vanes in Your Vacuum Pump work?
Replacing vanes works by restoring the pump’s sealing and compression inside the rotor/stator chamber: new carbon vanes slide outward (centrifugal force and differential pressure) to maintain contact with the housing, reducing internal leakage and improving ultimate vacuum, stability, and efficiency when installed with correct fit, orientation, and lubrication.
Working principle (what changes after replacement)
Rotary vane pumps rely on vanes to create expanding/contracting volumes that move gas from inlet to exhaust. Worn vanes shorten, chip, or lose edge integrity, increasing slip and heat.
| Condition | Internal leakage | Heat load | Vacuum performance |
|---|---|---|---|
| New, correctly fit vanes | Low | Normal | Near-spec |
| Worn/short vanes | High | High | Degraded ultimate vacuum |
| Wrong material/fit | Variable | Often high | Unstable, rapid wear |
Carbolve Pro Tip: Our technicians often see “good vacuum at start then rapid fade” when vanes stick in contaminated slots—after replacement, we always verify each vane’s free travel before sealing the end cover.
Benefits of using How to Replace the Vanes in Your Vacuum Pump
Replacing the carbon vane restores volumetric efficiency, lowers internal slip, and reduces run temperature, which typically improves ultimate vacuum, shortens pump-down time, and stabilizes performance under load. It also helps prevent secondary damage (scoring, bearing load) caused by chipped vanes and abrasive carbon fines circulating in oil.
Benefit-to-symptom mapping (practical outcomes)
| Symptom before | What vane replacement improves | What else to check |
|---|---|---|
| Slow pump-down | Better sealing/compression | Inlet leaks, clogged filter, undersized pump |
| Higher operating temp | Lower friction/leakage | Oil grade, cooling airflow, exhaust restriction |
| Noise/chatter | Smooth vane tracking | Rotor scoring, bearing wear |
| Oil darkening quickly | Less carbon shedding | Oil change interval, filtration, blow-by |
Carbolve Pro Tip: Our technicians often see the largest gains when vane replacement is paired with an immediate oil flush—carbon fines from the old set can rapidly “sand” the new vanes if left in circulation.
Maintenance tips for How to Replace the Vanes in Your Vacuum Pump
To extend vane life, keep oil clean and at the right viscosity, prevent ingesting particulates, and avoid extended operation at high inlet pressure. Regularly check oil level/color, inlet filtration, exhaust backpressure, and pump temperature. Schedule vane inspections based on hours, duty cycle, and vacuum stability trends rather than calendar time alone.
Preventive maintenance checklist (process)
- Daily/shift: Verify oil level, abnormal noise, and operating temperature.
- Weekly: Check for inlet leaks, inspect exhaust mist filter/backpressure, clean exterior cooling fins.
- Monthly/quarterly: Oil change (based on contamination), inspect inlet filter, trend ultimate vacuum and current draw.
- Planned outage: Inspect/measure vanes, rotor slot condition, end plate wear, replace seals/gaskets as needed.
Carbolve Pro Tip: Our technicians often see premature vane wear traced to exhaust restrictions—when the mist filter clogs, backpressure rises, temperature climbs, and the carbon vane edges glaze and chip sooner.
What’s your wholesale pricing and lead time for replacement vane kits compatible with our vacuum pump models?
Wholesale pricing and lead time depend on your pump make/model, vane dimensions (L×W×T), material grade, and required documentation/packaging. In general, stocked aftermarket carbon vane kits ship in 3–7 business days; custom or OEM-matched tolerances typically run 2–6 weeks. Share model numbers and photos for a firm quote.
What we need to quote accurately (comparison table)
| Input needed | Why it matters | How to provide |
|---|---|---|
| Pump make/model + serial | Confirms geometry and revisions | Nameplate photo |
| Vane dimensions & count | Sets kit configuration | Measure or send sample vane |
| Material requirement | Affects wear, friction, heat | Specify “carbon/graphite grade” needs |
| Tolerance targets | Ensures fit and sealing | Drawing/spec or measured fit notes |
| Quantity (MOQ/annual) | Sets wholesale tier | Forecast or blanket PO |
Carbolve Pro Tip: Our technicians often see “dimensionally correct” vanes fail in weeks when tolerance bands are too loose for a worn rotor—when you send us a used vane and rotor-slot measurements, we can recommend an oversize strategy or refurbishment path before you commit to volume buys.
Do you offer OEM/aftermarket vanes with documentation (material specs, tolerances) and support for vane replacement during maintenance?
Yes—Carbolve supplies OEM-equivalent and aftermarket carbon vane options with documentation packages (material specification, dimensional tolerances, inspection records when requested) and maintenance support. We can help validate vane orientation, fit checks, oil selection, and break-in procedure, and we’ll troubleshoot post-install issues using vacuum/current/temperature data you collect on-site.
Documentation & support options (process)
- Select grade & application: Duty cycle, inlet chemistry, temperature, target vacuum.
- Define tolerances: Standard vs. tightened fit for critical vacuum stability.
- Provide docs: Material spec sheet, dimensional report, lot traceability (optional).
- Install support: Remote walk-through, fit verification steps, break-in checklist.
Carbolve Pro Tip: Our technicians often see pumps reassembled with end-cover misalignment that mimics “bad vanes”; during support calls, we have customers log hand-rotation torque feel, motor current at start-up, and ultimate vacuum trend to pinpoint assembly vs. internal wear within minutes.
Replacing the carbon vane correctly restores sealing, reduces slip, and brings your vacuum pump back toward its original performance baseline.